
It all started with a YouTube video by Triple Tuned aka Ahtsi, member of NordBeat 😉 (Bananarama - Venus (AKAI Force 3.0.6, VIRUS b, Behringer TD-3)) back in 2020, where I saw the so-called Game Frame for the very first time. From that very moment, I was hooked—this little piece of retro tech instantly triggered a strong must-have feeling.
Triple Tuned in action – Bananarama – Venus (Remix)
The Game Frame (https://www.ledseq.com/product/game-frame) is a 16×16 pixel display capable of showing animated GIFs (or alternatively playing multiple BMPs in a loop). Because of this extremely limited resolution, the device had a very unique charm. The minimalist animations reminded me of early 8-bit arcade games and home computers, radiating exactly that nostalgic retro vibe that instantly got me.
Game Frame – product photos
All the more disappointing it was when I realized that this retro gadget was no longer available. Sold out, discontinued—game over.
To put it mildly, that was a bit of a buzzkill for my initial excitement. But instead of dropping the idea, a new thought began to form in my head: Why not build something similar myself?
Sounds great, right? Well… that idea initially sank beneath the surface—or better said, it went “on ice” for about five years. It was never completely forgotten, just quietly sitting somewhere in the back of my mind until I stumbled upon something that got things rolling again: a Raspberry Pi Pico 2W.
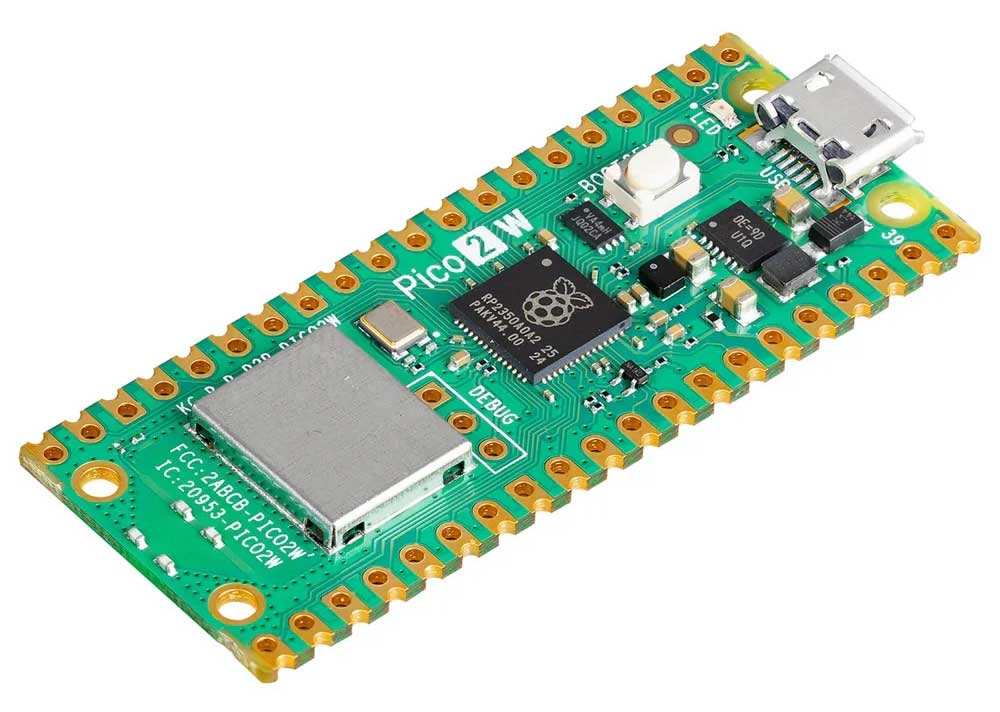
Raspberry Pi Pico 2W – with a Micro-USB port 🙈
From that moment on, things started moving. The old excitement came rushing back, now combined with new possibilities. The Pico 2W is small, cheap, energy-efficient—and surprisingly powerful. Built-in WiFi, enough processing power, flexible GPIOs, and an active community: exactly the kind of hardware that invites experimentation.
But why all this enthusiasm? I've always been fascinated by how much power these tiny microcontrollers pack. On a minimal footprint, they handle tasks that once required a full computer. They boot in fractions of a second, run reliably, consume very little power, and can be used for countless projects—from simple fun experiments (who doesn’t know the classic LED blink demo? 😉) to IoT and serious applications. And the best part? They cost next to nothing.
This mix of minimalism, efficiency, and creativity is exactly what brought the original Game Frame idea back from the depths of my brain—this time with the firm intention to actually build it.
So I started researching: Google, ChatGPT, Reddit, and various community forums were running hot to finally get things moving. I dug through countless posts, YouTube tutorials, and project reports, collected ideas, compared approaches, and learned from others’ experiences. At the same time, I began browsing Amazon, AliExpress, and other online shops for the required components, creating countless parts lists… and, well, ordering them too.
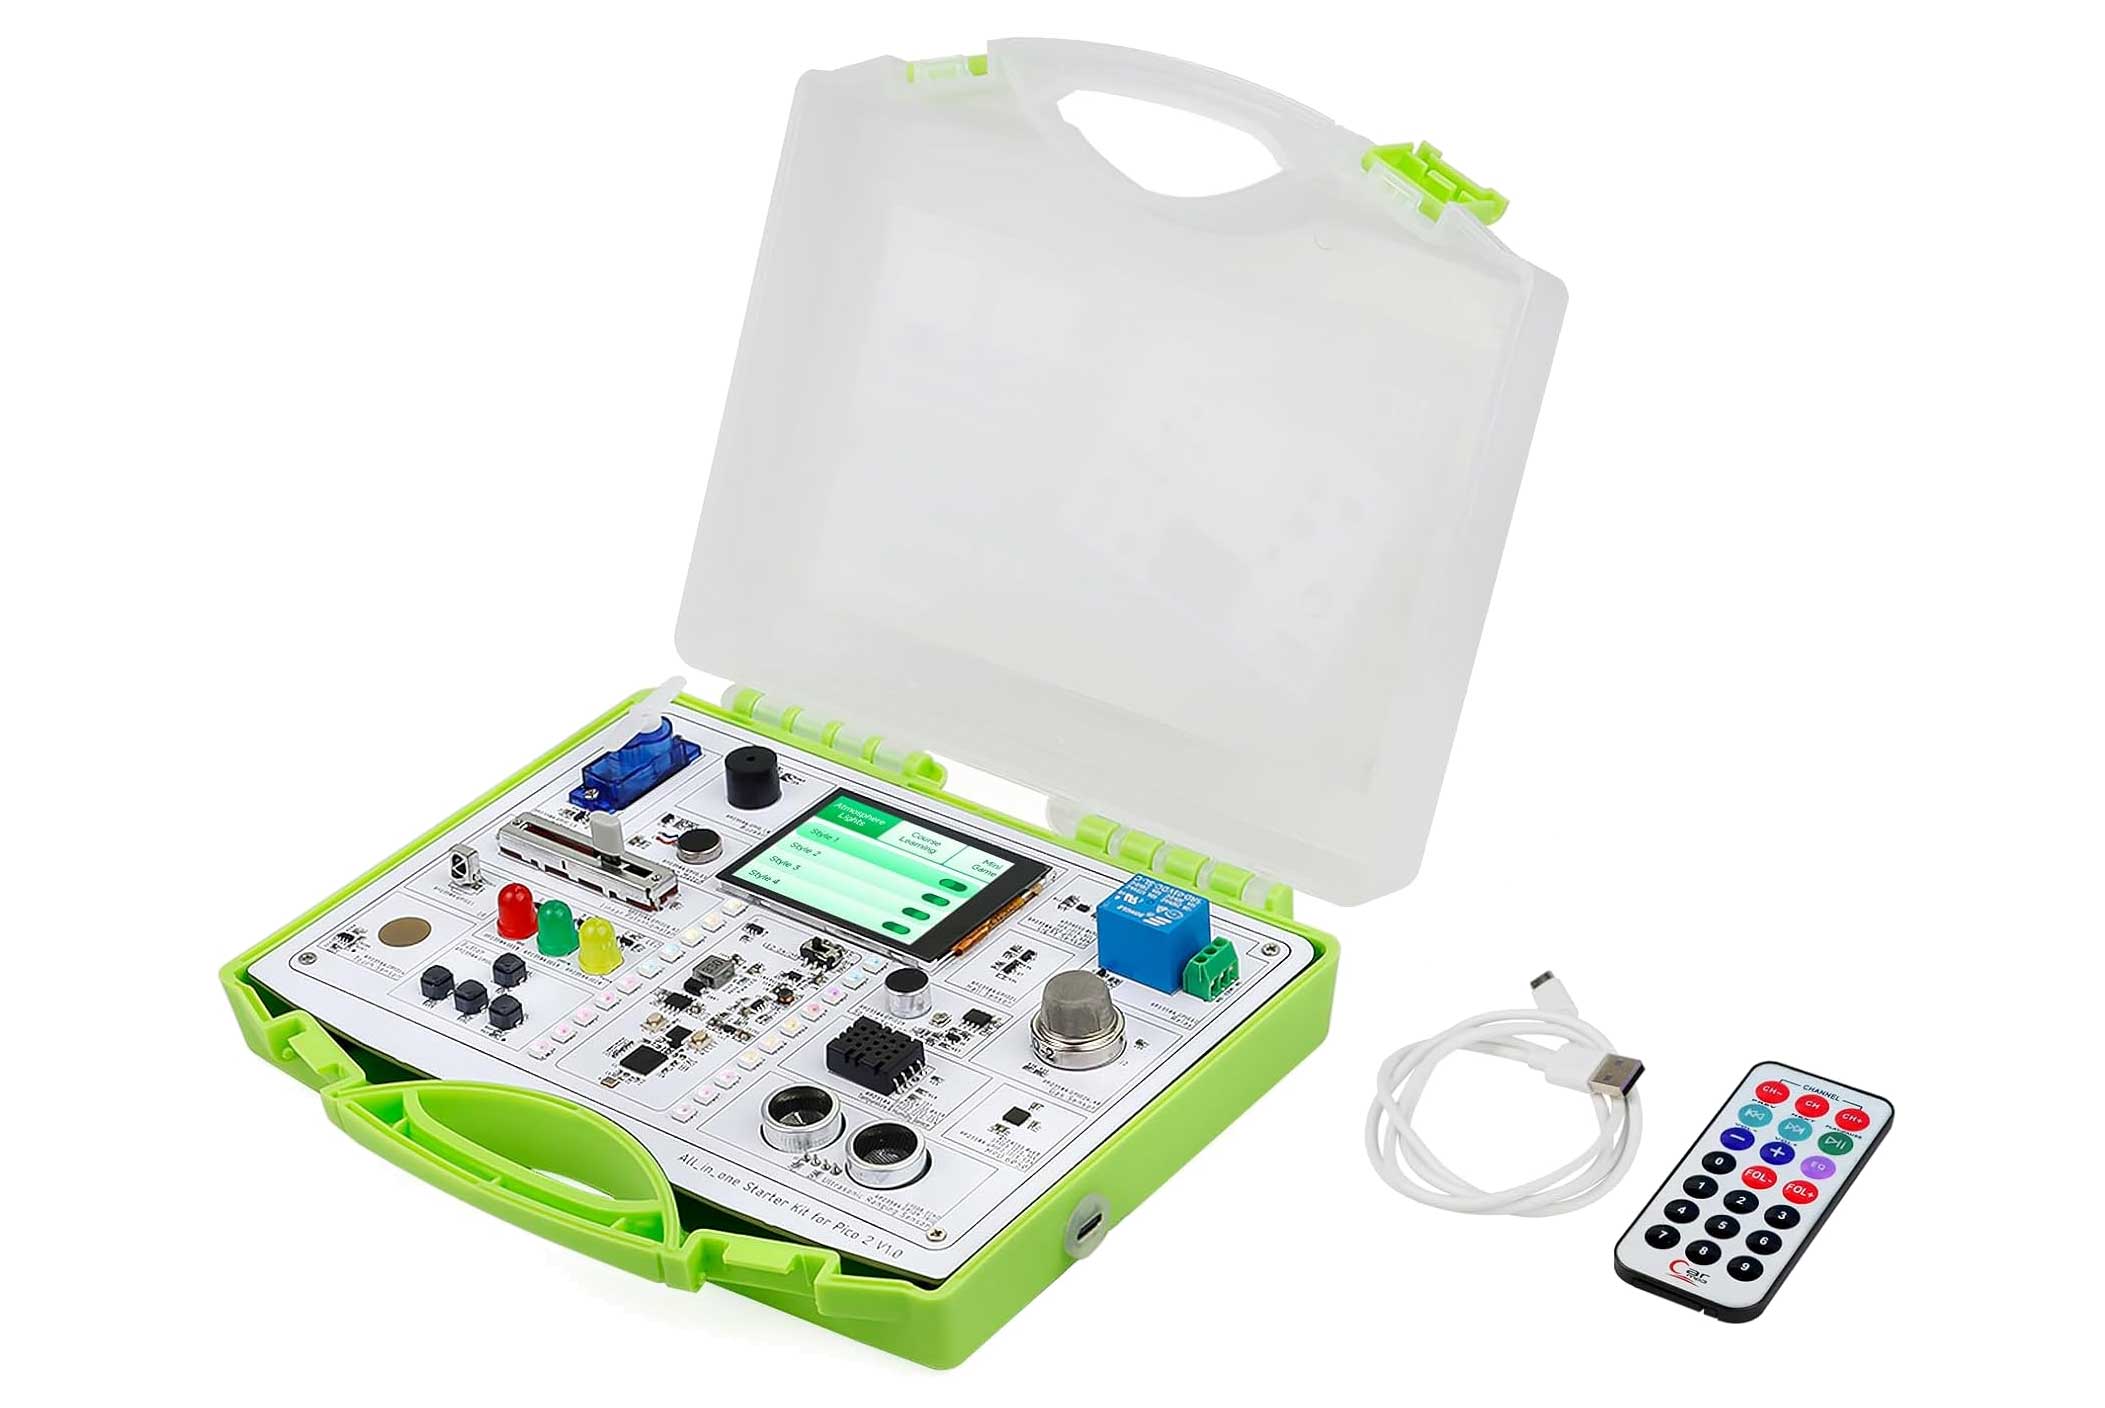
All-in-one starter kit for Pico 2. Can be programmed via Arduino IDE with many examples.
Naturally, the classic fundamental questions came up quickly: Which software should I use for development? Go with MicroPython, C/C++, or something else entirely?
Spoiler: It’s going to be Visual Studio Code with the PlatformIO extension. Programming will be done in C++ (ugh… guess I’ll have to deal with pointers after all).
But thanks to GitHub, there are already thousands of wheels that have been reinvented! I’m talking about WLED! 😉
Unfortunately, the Pico 2W had to go, since it’s not supported by the WLED project. But hey—as the Wendler would sing: doesn’t matter! There’s a solution: the ESP32 takes over the job.
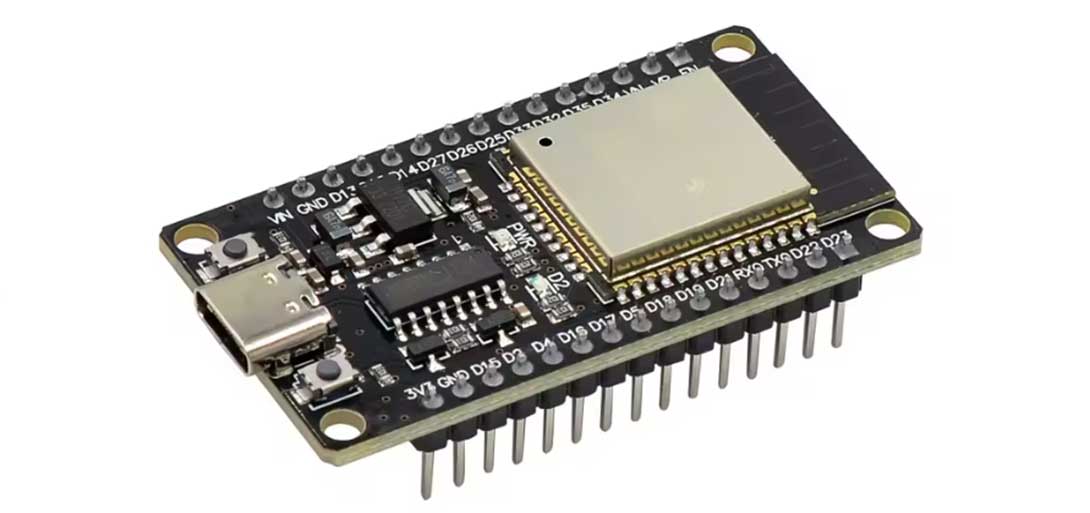
Espressif ESP32 – the heart of many IoT devices! This one’s an AliExpress clone.
And this little guy really packs a punch: with 240 MHz clock speed, WiFi, Bluetooth, and plenty of GPIOs, it delivers serious power in a tiny package. It’s compact, flexible—and honestly, kinda cute too 😎. And it has USB-C—finally!
As if that wasn’t enough, the ESP32 is even cheaper than the Pico 2W—which makes the decision even easier. On top of that, there’s a huge community and excellent software support, especially for projects like WLED that simplify the whole setup massively.
In short: the ESP32 isn’t just a worthy replacement—it’s almost an upgrade. The foundation (or should I say, the core MCU?) is set!
Now onto the display question: Should I build the 16×16 LED matrix completely from scratch using individual LEDs and drivers, or go for a ready-made module to save time and nerves?
Spoiler: It’s the latter. Better to buy it cheap than solder it myself—more expensive and worse!
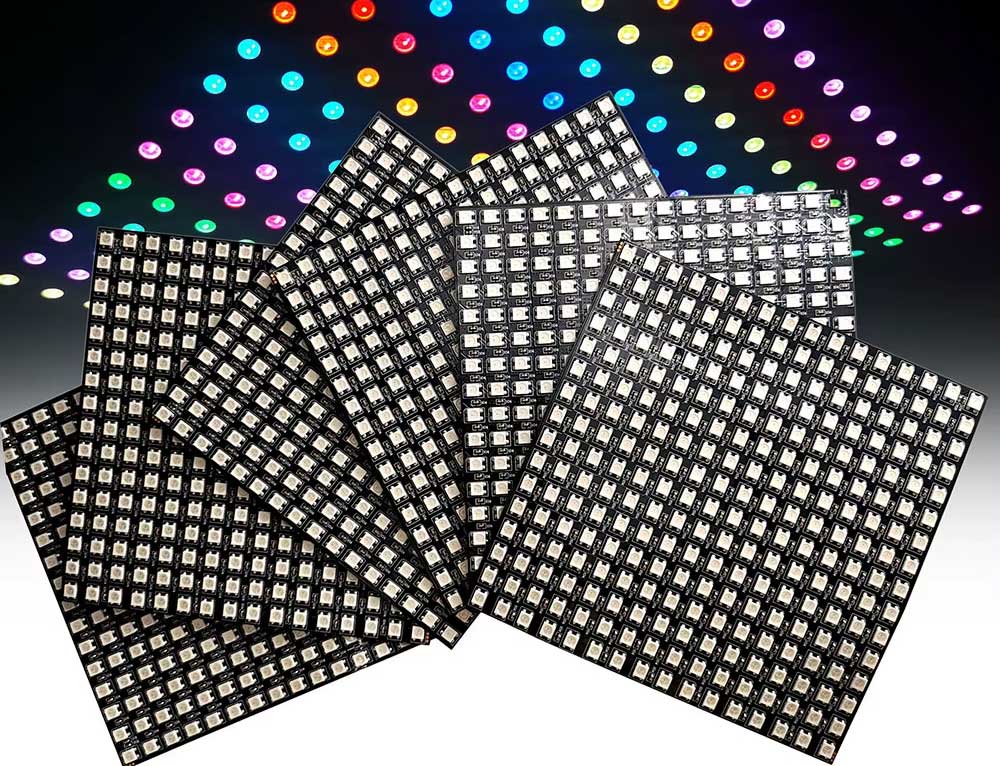
WS2812B RGB LED Digital Flexible Panel WS2812 IC Individually addressable 16x16 matrix display.
Link: WS2812B RGB LED-Matrix
Hardware design also turned out to be a bigger challenge than initially expected. What kind of enclosure would suit a project like this? Should it stay close to the original Game Frame design, or go for something more modern and unique? 3D printing, wood, acrylic—or something completely different? And last but not least: how do I actually build the enclosure so that everything fits together cleanly, is stable, and still looks good?
Another spoiler: A 3D printer will have to handle this job.
So far, so good—but now I actually have to model “the device” as well. Yeah right… Now I also have to learn Blender and FreeCAD? Dude, what am I getting myself into? 🤣
Well, no way around it—I had to dive in. So I took my first cautious “hello world” steps in Blender. And what can I say: the learning curve isn’t just steep—it’s basically a vertical wall. Shortcuts on top of shortcuts, modes on top of modes, and nothing works the way you’d intuitively expect.
Cursing every five minutes quickly became a proven method to release stress and frustration… 🤣 But at the same time, there were those small moments of success: when an object finally did what it was supposed to, or when a few primitive shapes slowly turned into something that actually looked like an enclosure.
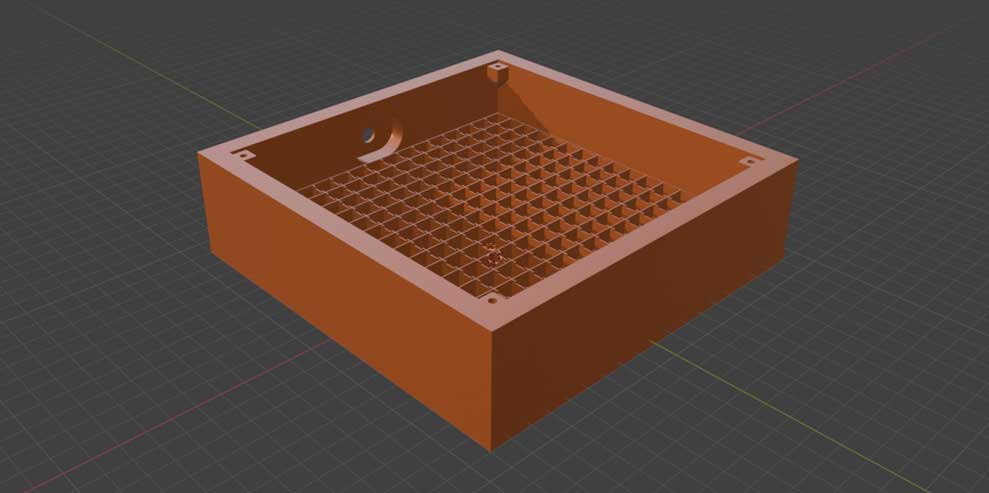
Enclosure prototype #2 modeled in Blender
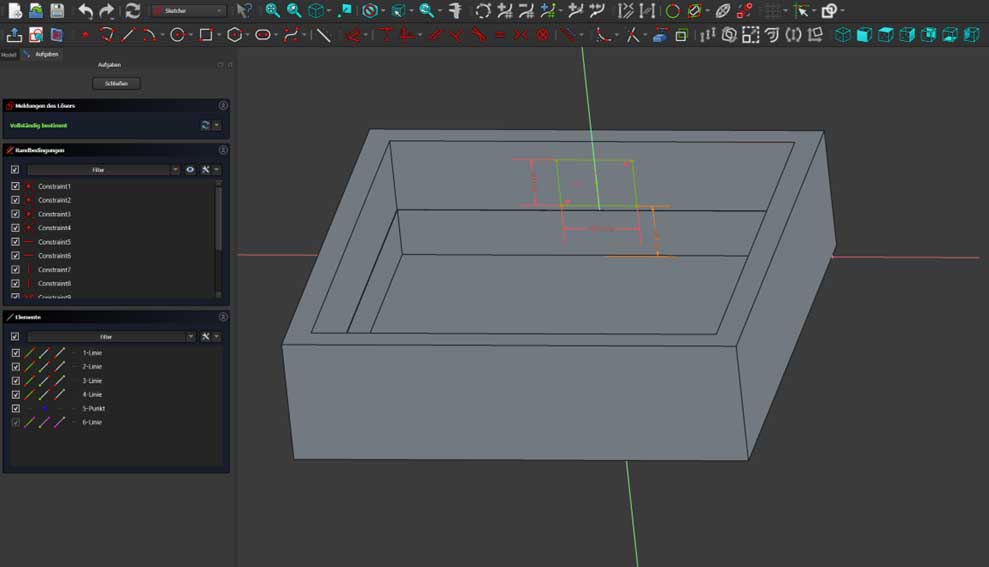
FreeCAD, on the other hand, felt more sober and technical, but came with its own quirks. Sketches, constraints, and dependencies needed to be understood and handled properly—one wrong click, and the entire model collapsed into geometric chaos… sometimes even accompanied by silent crashes. And yes, more cursing every five minutes 🙈
Still, with each evening spent in front of the screen, it became clearer: this wasn’t just a necessary evil, but another exciting part of the project.
In the end, FreeCAD became the tool of choice for my enclosure design. The deciding factors were that it’s completely free and open source, and especially its parametric design capabilities, which allow dimensions and proportions to be adjusted quickly and cleanly at any time.
For a project that constantly evolves during development, this is a huge advantage. And honestly, this more technical and structured approach just feels “right” when designing something functional and reproducible.
Many small steps in FreeCAD…
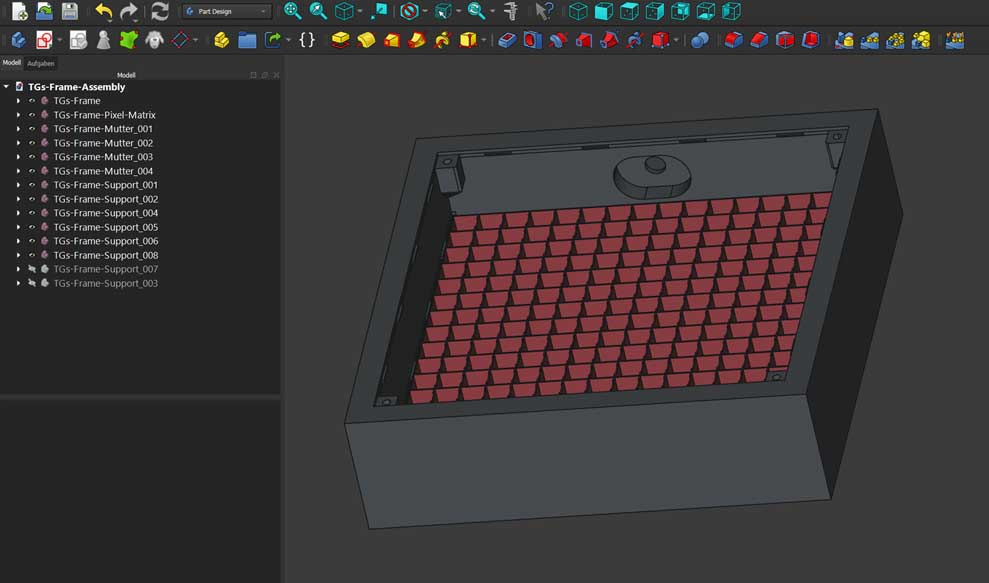
…lead to Rome!
The back of the frame in Bambu Lab Studio
Quick conclusion: In the end, this is exactly what it’s all about—learning new tools, stepping out of your comfort zone, and tackling things you wouldn’t have dared to try just a few weeks earlier.
And honestly? A bit of self-inflicted suffering is simply part of projects like this. 😄
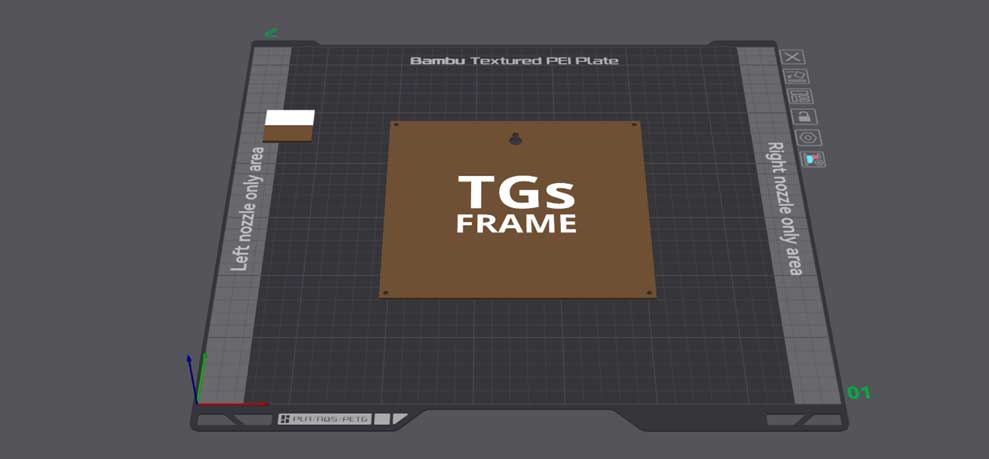
No more talking—let’s go! Off to my buddy who owns a Bambu Lab multi-material 3D printer. Sent him the model, adjusted the print settings, and hit start.
Now it’s time to wait, drink some tea, and hope the printer doesn’t turn everything into spaghetti.

It’s an amazing moment when ideas, virtual sketches, and parameters suddenly become something tangible. Layer by layer, the 3D printer brings my enclosure to life, and while watching it, the whole project slowly becomes real. Every line, every edge, every hole—everything fits as planned.
INTERIM CONCLUSION: This is the step where the project truly becomes “real.” From screen to printer—and soon I’m holding my very own self-designed Game Frame enclosure in my hands.
Time for a well-earned beer to celebrate this milestone. 🍻
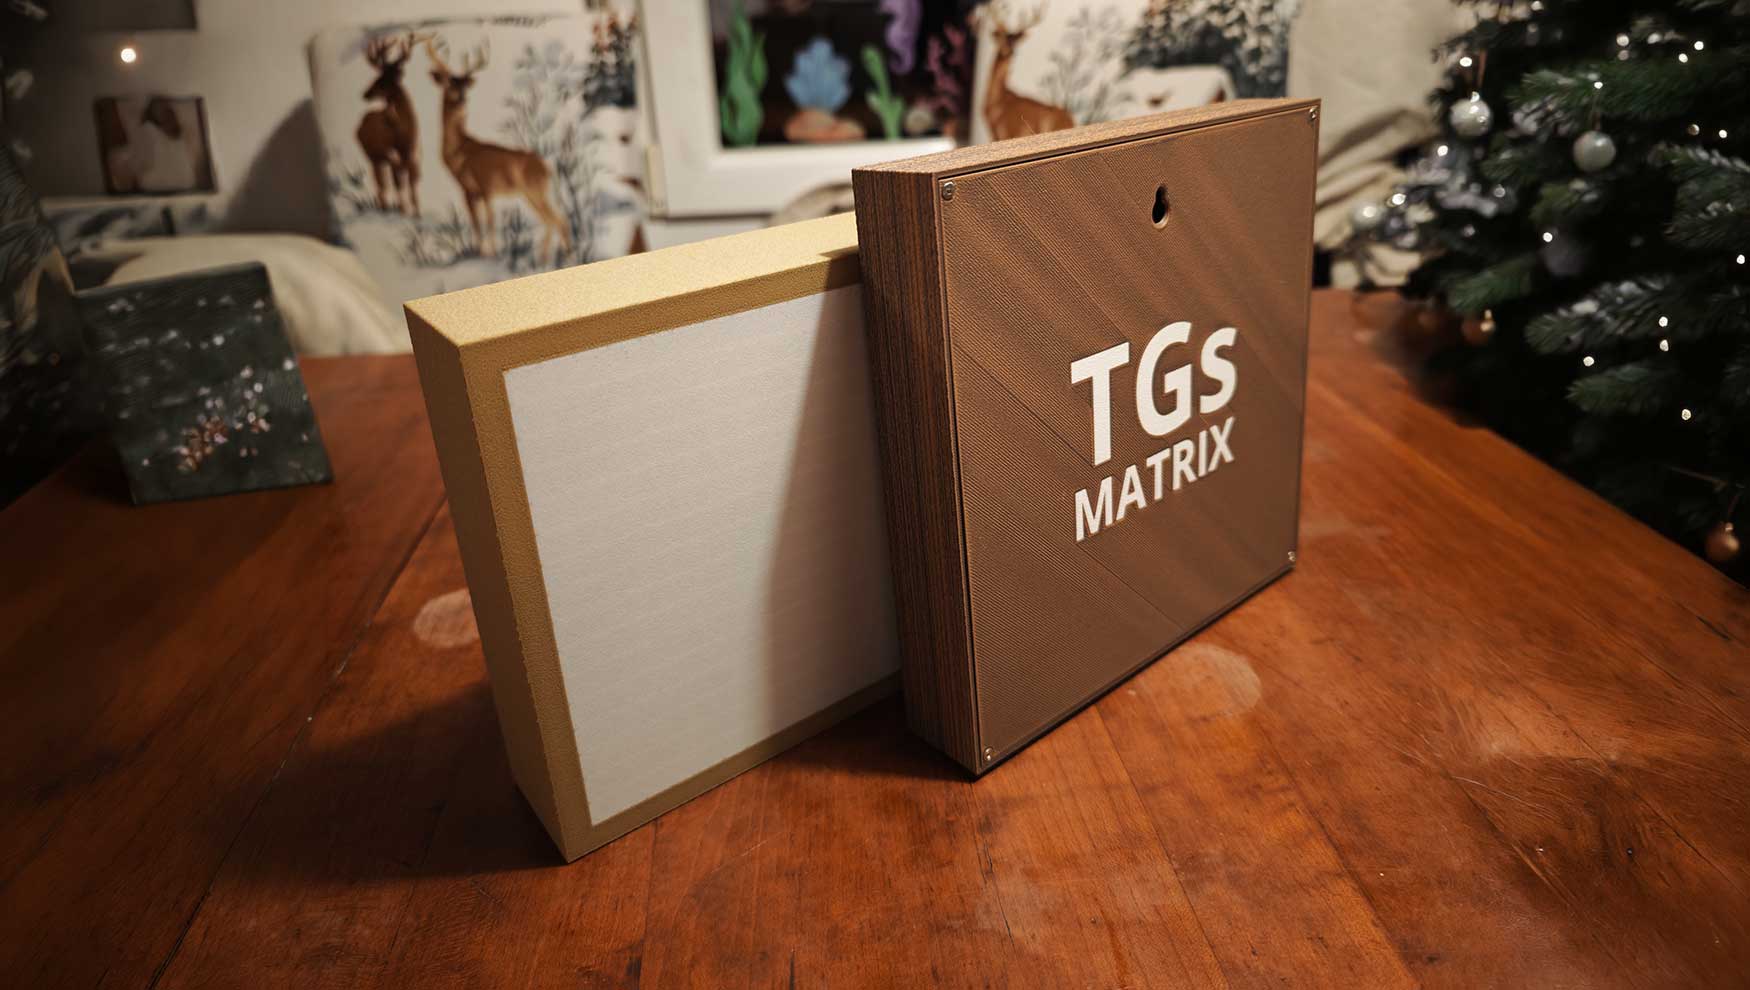
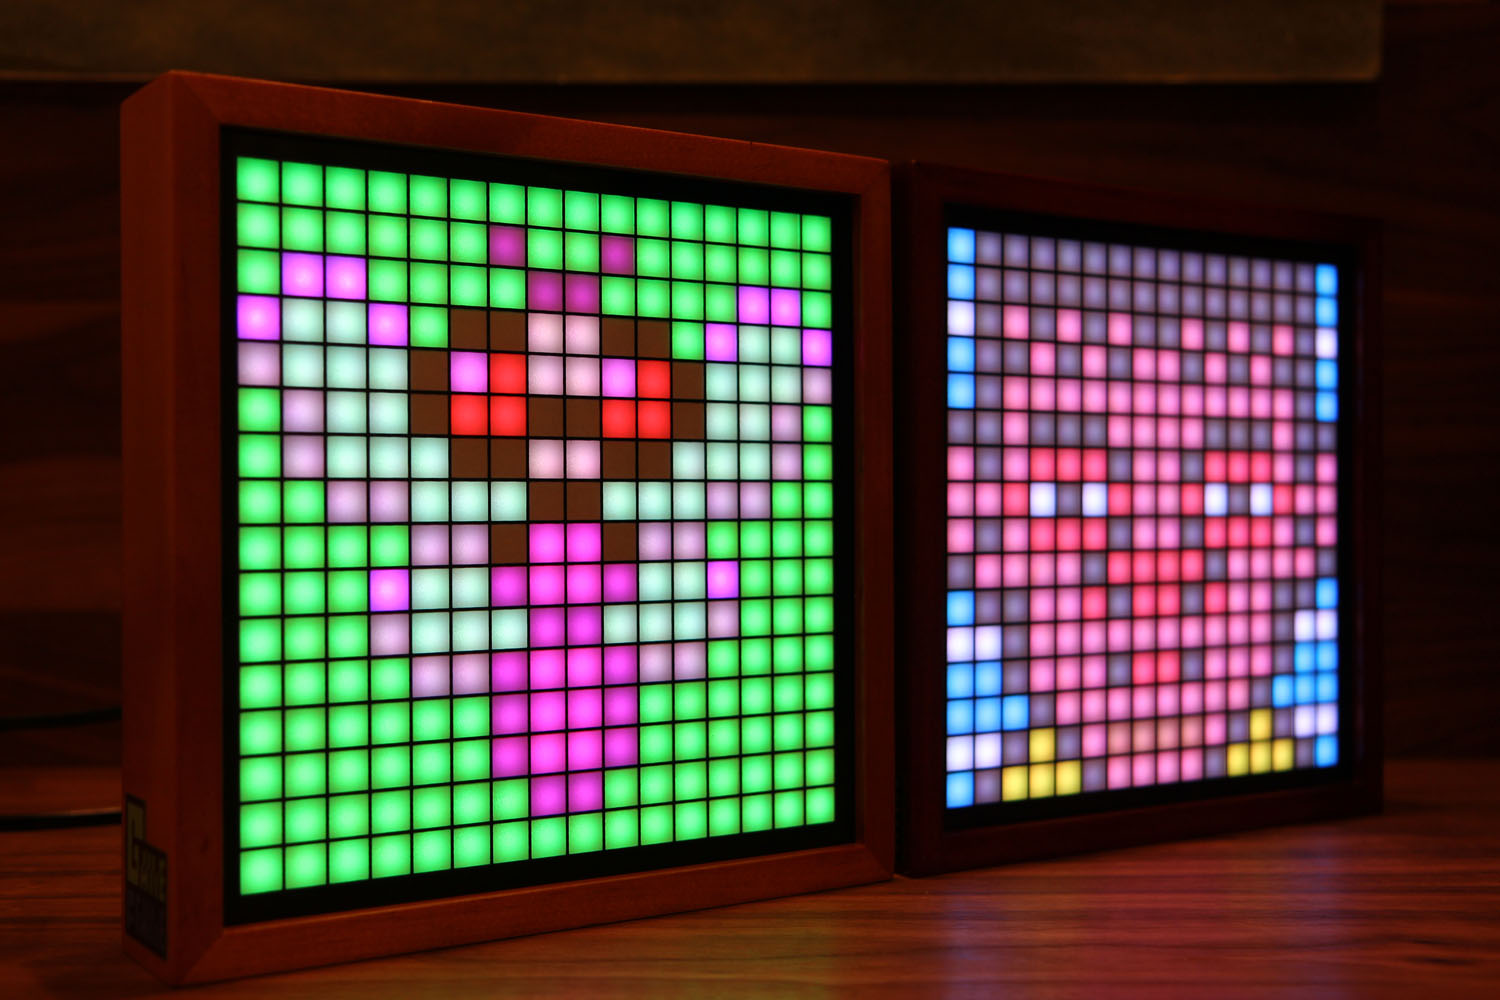
The first two prototypes TGs Frame and TGs Matrix P3.
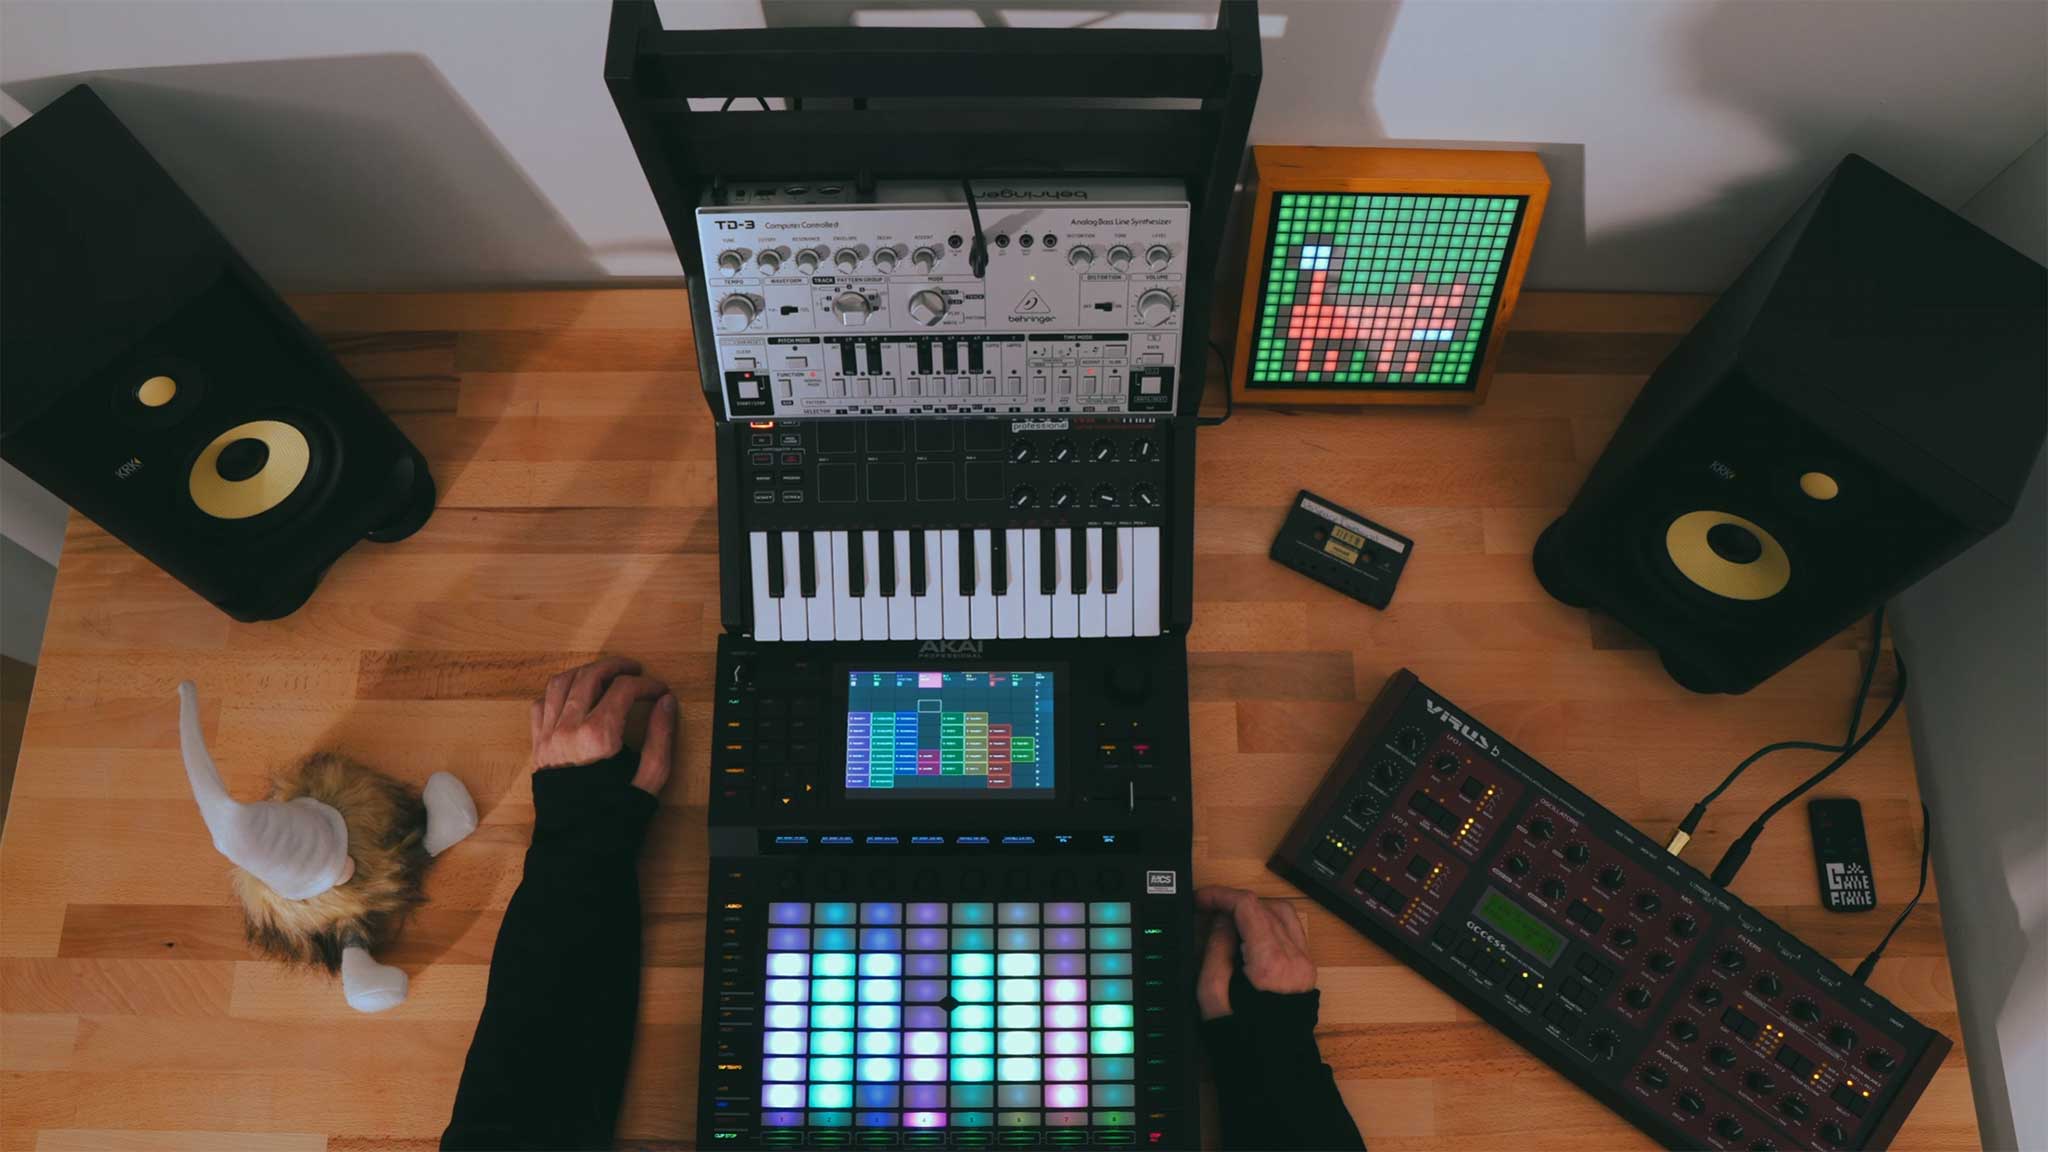
Now it's time for the configuration & programming of my babies «TGs Frame» in WLED.
MY FINAL CONCLUSION for this retro trip: Countless hours of tinkering, flashing, testing, discarding, and restarting. But every small success—whether it was a correctly displayed GIF or a new working preset—made it all worth it.
And that’s exactly what makes projects like this so addictive.
But this "never-ending story" is far from over... Stay tuned for the next retro-trip step! 😉
So long!
___
/.G